Loading…
← Routes
First run
New Player Route
What to start with, what to prioritize, what to ignore — from level 1 to the World Tree.
0%
0/29 · 6 phases
est. time60 h (~)estimate
New Player Route
0%
Settings & temp camp
0 of 5 done
Two minutes of settings worth hours, then a throwaway camp — not a base.
▶ Current objective
0.1Choose your difficulty honestly
You've picked a difficulty and you know it changes what the route's times mean.
Details
Why This route's estimated times assume normal difficulty with no multipliers — modified settings are fine, but your times stop being comparable to the guide.
How to check it's done
- A difficulty is selected; you noted whether you're on vanilla or modified settings.
- Comparability
- don't mix vanilla runs with modified-settings runsestimate
0.2Set the time-saver options (optional)Optional
If you want a faster run, the four legit time-savers are set before you spawn.
Details
Why These four settings cut busywork without trivializing combat — the community treats them as fair for a solo rush.
Prerequisites
- Difficulty chosen (0.1)
How to check it's done
- Death penalty, supply drops, incubation and weight are set to your taste.
- Death penalty
- set to “No Item Drop” to avoid corpse-run detoursestimate
- Supply drop interval
- 3 h default → 15–60 min for more free gearestimate
- Egg incubation
- set to instant to skip the wait on breeding laterestimate
- Item weight
- reduce or disable if backtracking annoys youestimate
0.3Know the performance trade-offOptimization
You understand that more bases and more Pals per base cost frame rate.
Details
Why Newcomers over-build early and then wonder why the game stutters — the cause is base/Pal count, not the settings.
Prerequisites
- Time-savers set (0.2)
How to check it's done
- You'll cap base count and per-base Pals to keep performance smooth.
- Performance warning
- more bases and more Pals per base degrade performanceestimate
0.4Drop a temp camp, not a baseBlocking
Palbox, a chest, a campfire and a bed are placed. Nothing more.
PalboxSKIPBig pretty base in the early gameDetails
Why This first camp is disposable — you'll relocate to an ore spot; every minute decorating it is wasted.
Prerequisites
- Performance trade-off understood (0.3)
How to check it's done
- A Palbox exists with a chest, a campfire and a bed — and nothing decorative.
SKIPBig pretty base in the early gameverified
Your base is good enough. Leave now. Upgrade nothing until you've caught a mount — the location will change anyway.
- Minimum viable camp
- Palbox + chest + campfire + bed — decorate at endgame, not nowestimate
0.5Unlock the priority technologiesBlocking
The early tech that unblocks catching, food and crafting is unlocked in order.
Pal SphereFeed BoxDetails
Why Spending tech points on the wrong recipes early stalls everything — this order keeps you catching and fed.
Prerequisites
- Temp camp dropped (0.4)
How to check it's done
- Pal Sphere, workbench, campfire, chest, bed, stone tools, berry plantation, feed box, ranch and bow are unlocked.
- Priority technologies
- Pal Sphere → primitive workbench → campfire → chest → bed → stone tools → berry plantation → feed box → ranch → bowestimate
Getting started
0 of 10 done
LV 1–15estimate
Missions, the right catches, first base, first mounts, Tower 1.
Solid checkpoint + small squad~10 hestimate
1.1Follow the missions, alwaysBlocking
You treat the mission log as your to-do list — nothing skipped.
Details
Why Missions are big XP AND they gate progression: fast travel, spawns, whole regions unlock through them.
Prerequisites
- Priority tech unlocked (0.5)
How to check it's done
- The mission tab is open and you're working the top active mission.
- Missions
- big XP sources AND blocking: fast travel, spawns, progressionverified
1.2Spend your first sphere on
 CattivaBlocking
A
Cattiva is caught and working your camp.CattivaDetails
Why Every beginner guide agrees: the first sphere goes to
Cattiva — it crafts, mines, gathers and carries from minute one.Prerequisites
- Following missions (1.1)
How to check it's done
- A Cattiva is assigned to your camp and doing work.
- Cattiva work
- Handiwork · Mining · Gathering · Transportingestimate
- Cat Helper passive
- +50 carry weight per Cattiva in your party (stacks)estimate
1.3Catch the core work teamImportant
Kindling, ranch and support roles are covered by caught Pals.
 Foxparks
 Vixy
Vixy Lamball
 Chikipi
 Pengullet
 Daedream
Details
Why A camp that cooks, produces spheres and defends itself lets you leave and level instead of babysitting.
Prerequisites
- Cattiva working (1.2)
How to check it's done
- Kindling, a ranch producer and a support Pal are all caught and assigned.
1.4Catch the early carries and minersOptimization
You have a Pal that punches above your level for early fights and mining.
 Pupperai
 Rushoar
 Tombat
 Incineram
Details
Why One or two strong early Pals carry the whole 1–15 stretch — knowing which ones saves hours of underleveled fighting.
Prerequisites
- Work team caught (1.3)
How to check it's done
- At least one early carry is in your active party.
- Best Boy (Pupperai)
- +10% melee damage passiveestimate
- Rushoar (mount)
- +500% stone destructionestimate
- Tombat
- Mining lv. 3 — buffed in 1.0estimate
- Incineram
- lv. 10, single spawn spot — big early carryestimate
1.5Run the 5-per-species XP loopBlocking
You catch 5 of a species, then switch species — systematically.
STOPSingle-species farming (e.g. 12Cattiva)Details
Why The capture bonus is the fastest XP in 1.0 and it's independent of your world XP multiplier — but it caps at 5 per species.
Prerequisites
- Early carries caught (1.4)
How to check it's done
- You reach 5 catches on a species, then move to a new one instead of over-farming.
STOPSingle-species farming (e.g. 12
Cattiva)verifiedThe capture bonus caps at 5 catches per species in 1.0: past that, XP/minute collapses. Stop at 5, switch species.
Pays off: Diversifying captures = better XP
Capture bonus12 → 5 catches/speciesverified
- Optimal XP loop
- 5 catches of one species, then SWITCH speciesverified
- Cap
- 12 → 5 catches per species in 1.0verified
1.6Place your first base + passive arrow lineImportant
Base placed on flat ground; passive arrow production is running.
 RobinquillSKIPBig pretty base in the early game
Details
Why A base that self-produces food, spheres and arrows feeds both the player and the team XP while you're away — flat ground avoids Pal pathing bugs.
Prerequisites
- XP loop running (1.5)
How to check it's done
- Food, ranch, sphere and arrow lines all run without manual input.
SKIPBig pretty base in the early gameverified
Your base is good enough. Leave now. Upgrade nothing until you've caught a mount — the location will change anyway.
- Base placement
- flat, open ground near resources and a fast travel pointestimate
- Arrow line prerequisite
- High Quality Workbench + a Handiwork lv. 2 Palestimate
- Arrow rate
- ~1.5 s/arrow — XP to the player and the teamestimate
- Early food variant
- Fire Pal + campfire loaded with red berriesestimate
1.7Spend your stat points (quality of life first)Important
You've picked an allocation school and stuck to it — Weight/Stamina before damage.
Details
Why Weight and Stamina remove the two things that slow a new player the most (trips home, running dry); raw damage matters far less early.
Prerequisites
- First base placed (1.6)
How to check it's done
- Every level-up point went into Weight or Stamina, not Attack/HP.
- Guide consensus
- Weight, Stamina, HP — quality of life before raw damageestimate
- fandomwire school
- Stamina firstestimate
- mobalytics school
- Weight firstestimate
- Work Speed early
- only if your Pals don't cover crafting yet — otherwise a wasted pointestimate
1.8Unlock your first mountsBlocking
A ground mount and your first flyer are unlocked.
 Eikthyrdeer
 Nitewing
 Celaray
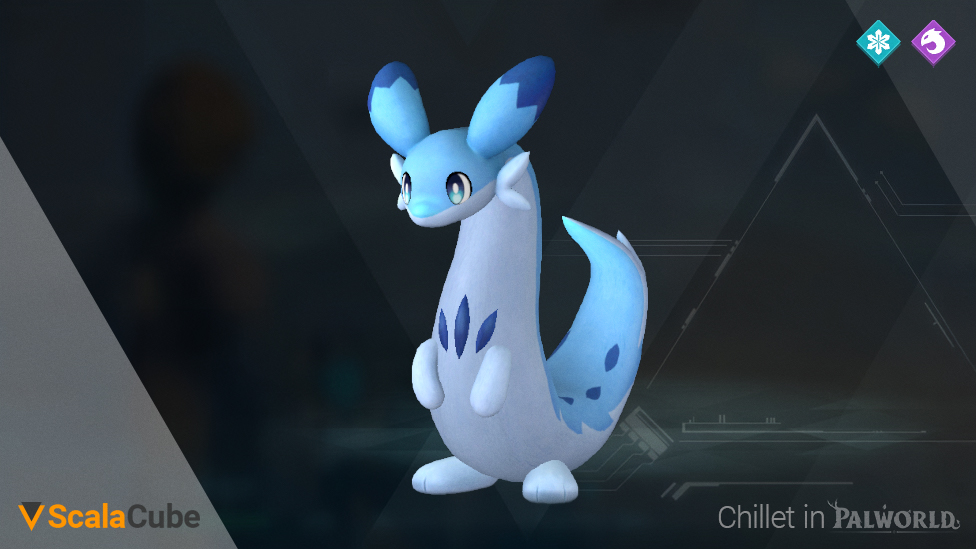
 Chillet
Details
Why Mobility is the single biggest time-saver early — a flyer turns a two-minute trek into ten seconds and lets you catch effigies at night.
Prerequisites
- Stat school picked (1.7)
How to check it's done
- A ground mount (Eikthyrdeer) and a flyer (Nitewing) are ridable.
- Rushoar saddle
- 6 tech lv.estimate
- Celaray glider
- 7 tech lv.estimate
- Eikthyrdeer saddle
- 12 tech lv.estimate
- Nitewing saddle
- 15 tech lv.estimate
1.9Grab every effigy on your pathOptimization
Reflex installed: no
 Lifmunk Effigy left behind, turned in at the Statue of Power.KEEPLifmunk/Pal Effigies
Details
Why Effigies raise Capture Power, which directly improves catch rates — better catches make the whole XP loop faster.
Prerequisites
- Mounts unlocked (1.8)
How to check it's done
- Collected effigies are turned in at a Statue of Power; Capture Power went up.
KEEP
Lifmunk/Pal EffigiesverifiedFeed the Statue of Power: global capture rate.
Pays off: Statue of Power
- Turn-in
- Statue of Power → raises Capture Power (better catch rates)estimate
- Hunting them
- they glow green — easiest to spot at night on a flying mountestimate
- View on map
1.10Tower 1 — Zoe &
 GrizzboltBlocking
First tower boss defeated.
PupperaiFoxparksKEEPAncient Technology PointsDetails
Why The first tower unlocks progression and hands +5 Ancient Technology Points — bring Ground to answer the Electric boss.
Prerequisites
- Effigy reflex installed (1.9)
How to check it's done
- Zoe & Grizzbolt defeated; +5 Ancient Technology Points banked.
KEEPAncient Technology Pointsdatamined
The budget is tight all the way to endgame: don't blow them early.
Pays off: Triple Jump Boots, Soralite Quarry, Ancient Hatchery, Wing Pack
Triple Jump Boots (lv. 70)6 ptsdataminedSoralite Quarry (~lv. 72)7 ptsdataminedAncient Hatchery (~lv. 76)8 ptsdataminedWing Pack (lv. 80)9 ptsdatamined
- Zoe & Grizzbolt
- 10 lv.estimate
- Counter
- Ground skills (Eikthyrdeer, Pupperai) — boss is Electricestimate
- Tower boss timer
- 5 minverified
- Ancient Technology Points on first clear
- 5 ptsverified
Industrialization
0 of 5 done
LV 15–30estimate
Mining base, firearms, first cakes, Towers 2–3.
2.1Build a dedicated mining base
Second base placed on an ore spot, continuous production.
Details
- Logistics principle
- resource → processing station → output chestestimate
- Example lines
- mining → furnace → ingot chest · plantation → kitchen → feed box · ranch → ranch chestestimate
- Layout rules
- short distances, no stairs, wide doors, food separate from industry, per-Pal work prioritiesestimate
2.2The 5 traps that cost hours
You know what you're NOT building before endgame.
Details
- Trap #1
- building a big pretty baseestimate
- Trap #2
- crafting every technology “just to see”estimate
- Trap #3
- investing in Work Speed when your Pals already cover the workestimate
- Trap #4
- condensing a temporary Palestimate
- Trap #5
- starting mass breeding before the right cakesestimate
2.3Switch to firearms
First firearm crafted and supplied.
STOPCrafting mid-tier firearmsDetails
STOPCrafting mid-tier firearmsestimate
Don't blow your resources on a weapon that gets replaced two tiers later. Wait for a stable tier before investing.
2.4Farm Alphas and dungeons
Alpha Pal and dungeon rotation in place — catching, not killing.
KEEPDuplicate blueprints/schematicsKEEPSkill Fruits / Ripe Awakening StarfruitDetails
KEEPDuplicate blueprints/schematicsestimate
Not consumed on learning: a late-game item combines duplicates into rarer versions — keep every duplicate.
Pays off: Late-game combining into rarer versions
KEEPSkill Fruits / Ripe Awakening Starfruitestimate
Required for star-rank promotion — never consume one at random.
Pays off: Star-rank promotion
- Alpha Pals
- CATCHING pays far more than killingestimate
- Alpha respawn
- 15 min (~)estimate
- View on map
2.5Towers 2 and 3
Two more tower bosses (10 Ancient Technology Points).
KEEPAncient Technology PointsDetails
KEEPAncient Technology Pointsdatamined
The budget is tight all the way to endgame: don't blow them early.
Pays off: Triple Jump Boots, Soralite Quarry, Ancient Hatchery, Wing Pack
Triple Jump Boots (lv. 70)6 ptsdataminedSoralite Quarry (~lv. 72)7 ptsdataminedAncient Hatchery (~lv. 76)8 ptsdataminedWing Pack (lv. 80)9 ptsdatamined
- Ancient Technology Points on first clear
- 5 pts/towerverified
Breeding and midgame
0 of 3 done
LV 30–45estimate
Basic breeding, Towers 4–5, dungeon loops.
3.1Start breeding (1.0 rules)
Breeding farm running, with cakes matched to the goal.
KEEPMutation-passive Pals (Babysitter, Immortality, Skymarcher, Idiosyncratic)Details
Forget every pre-1.0 guide: the combos are entirely reworked. Exact cake effects: source status D/E.
KEEPMutation-passive Pals (Babysitter, Immortality, Skymarcher, Idiosyncratic)datamined
Ultra-rare Mutation passives (breeding, combat, sky-island traversal) — keep every carrier.
Pays off: Mutation breeding
Base mutation rate1%dataminedWith Deluxe Vegetable Cake3%/egg (+2 pts)datamined
- Breeding combos
- ALL reworked in 1.0 — pre-1.0 calculators obsoleteverified
- Mushroom Cake
- +chance of better statsdatamined
- Vegetable Cake
- 2 eggs at oncedatamined
- Deluxe Vegetable Cake
- +mutation chancedatamined
- Cake cadence
- a new cake every 15 levels from level 30estimate
- View on map
3.2Towers 4 and 5
All Palpagos towers cleared.
KEEPAncient Technology PointsDetails
KEEPAncient Technology Pointsdatamined
The budget is tight all the way to endgame: don't blow them early.
Pays off: Triple Jump Boots, Soralite Quarry, Ancient Hatchery, Wing Pack
Triple Jump Boots (lv. 70)6 ptsdataminedSoralite Quarry (~lv. 72)7 ptsdataminedAncient Hatchery (~lv. 76)8 ptsdataminedWing Pack (lv. 80)9 ptsdatamined
- Ancient Technology Points on first clear
- 5 pts/towerverified
3.3Chain dungeons
Dungeon rotation for Training Manuals, Skill Fruits and blueprints.
KEEPSkill Fruits / Ripe Awakening StarfruitKEEPDuplicate blueprints/schematicsDetails
KEEPSkill Fruits / Ripe Awakening Starfruitestimate
Required for star-rank promotion — never consume one at random.
Pays off: Star-rank promotion
KEEPDuplicate blueprints/schematicsestimate
Not consumed on learning: a late-game item combines duplicates into rarer versions — keep every duplicate.
Pays off: Late-game combining into rarer versions
- Catch-up
- Training Manuals in sanctuaries and dungeonsestimate
Feybreak and economy
0 of 3 done
LV 45–65estimate
Feybreak, the Gold Coin Press money printer, endgame prep.
- View on map
4.1Feybreak and its tower
Feybreak region explored, Bjorn &
 Bastigor tower cleared.KEEPAncient Technology Points
Details
KEEPAncient Technology Pointsdatamined
The budget is tight all the way to endgame: don't blow them early.
Pays off: Triple Jump Boots, Soralite Quarry, Ancient Hatchery, Wing Pack
Triple Jump Boots (lv. 70)6 ptsdataminedSoralite Quarry (~lv. 72)7 ptsdataminedAncient Hatchery (~lv. 76)8 ptsdataminedWing Pack (lv. 80)9 ptsdatamined
- Feybreak Tower (Bjorn & Bastigor)
- -1294 / -1669estimate
- Feybreak Tower (Bjorn &
4.2Build the economy
Gold production automated.
Gold Coin PressDetails
- Gold Coin Press
- 48 lv.estimate
- Gold sources
- surplus Pals, useless drops, chests, dungeons, Vixy ranch, merchantsestimate
- Ammo: buy or craft?
- no universal rule — compare purchase price vs materials + work time + Pal opportunity costestimate
4.3Prep the endgame
Stocks built,
 Bellanoir raid attempted, Legend chains scouted.KEEPBellanoir raid lootKEEPLegend-passive Pals (
 Jetragon,
  Frostallion,
  Necromus,
  Paladius)KEEPAncient Civilization Cores/PartsKEEPDuplicate blueprints/schematics
Details
KEEP
Bellanoir raid lootestimateExclusive Training Crystals, IV/Stat Fruits (Power/Life/Stout) for perfect-stat breeding, Ultra Slabs, boss eggs.
Pays off: Level catch-up + perfect-stat breeding
KEEPLegend-passive Pals (
Jetragon, Frostallion, Necromus, Paladius)estimateThe Legend passive cannot be rolled: breeding chains only — keep every carrier.
Pays off: Legend breeding chains
KEEPAncient Civilization Cores/Partsestimate
Required by Ancient/Legendary crafts — sources: Oil Rigs and raids.
Pays off: Ancient/Legendary crafts
KEEPDuplicate blueprints/schematicsestimate
Not consumed on learning: a late-game item combines duplicates into rarer versions — keep every duplicate.
Pays off: Late-game combining into rarer versions
- Special Cake
- forces inheritance of all 4 parent passives — ~lv. 74datamined
- Exploration team
- fast mount, catcher Pal, status Pal, main fighter, biome flexestimate
- Boss team
- elemental DPS, status, tank or shield, mobility, second DPSestimate
Endgame
0 of 3 done
LV 66–80estimate
Sunreach, the Panthalus chain, the World Tree: the same path as the Veteran Route, detailed step by step over there.
Solar Light Quarry72 lv.estimateAncient Hatchery76 lv.estimate
- View on map
5.1Sunreach
Modules disabled, Auri &
 Shaolong defeated, Soralite farm started.KEEPSoralite
Details
KEEPSoraliteestimate
Sunreach's endgame ore, smelted at the Ancient Furnace only.
Pays off: Endgame crafts (Ancient Furnace)
- Plasma Multicutter unlock
- 66 lv.estimate
- Auri & Shaolong
- 68 lv.estimate
- The 6 defense modules
- each marked by a light beam — purple teleport orbs if you lack a flying mount; validation: the central tower's whirlwind disappearsestimate
- Sunreach priority order
- 1. watchtowers & fast travel · 2. missions · 3. catches ×5/species · 4. Soralite · 5. new schematics · 6. Shaolong &
 Renjishiestimate
- View on map
5.2
 Panthalus chainPanthalus caught, World Tree terminal activated (Panthalus in the active party).
 BeakonKEEPAncient Technology Points
Details
KEEPAncient Technology Pointsdatamined
The budget is tight all the way to endgame: don't blow them early.
Pays off: Triple Jump Boots, Soralite Quarry, Ancient Hatchery, Wing Pack
Triple Jump Boots (lv. 70)6 ptsdataminedSoralite Quarry (~lv. 72)7 ptsdataminedAncient Hatchery (~lv. 76)8 ptsdataminedWing Pack (lv. 80)9 ptsdatamined
- Panthalus
- 70 lv.estimate
- Capture
- guaranteed at the last sliver of HP — weak to Electricestimate
- Sequence
- Researcher on the Deserted Islet (west of the No Man's Trail FT) → 4 Echobones marked on the map → flute on any workbench → blue stone to summon → talk to the Researcher again after the catchestimate
- View on map
5.3World Tree and Sealed Calamity
Guardians down, door open, Zenara &
 Astralym defeated.Gas MaskKEEPWorld Tree Holy WaterKEEPRadiant GemsKEEPPaloxite + Mythical WoodKEEPAncient Relics (Glistening/Decayed)
Details
KEEPWorld Tree Holy Waterestimate
Keeps World Tree resources from vanishing AND doubles as a craft input — save it with a rainbow-passive Pal.
Pays off: World Tree farming + craft inputs
KEEPRadiant Gemsestimate
The core of the Awakening mechanic — farmed in the depths of the World Tree.
Pays off: Awakening
KEEPPaloxite + Mythical Woodestimate
Key inputs of the Ancient Relic Recycler, harvested in the World Tree.
Pays off: Ancient Relic Recycler
KEEPAncient Relics (Glistening/Decayed)datamined
Never toss one: feedstock for the Ancient Relic Recycler to roll legendary passives.
Pays off: Legendary passives (God of Destruction, Dimensional Leap…)
Ancient Relic Recycler unlock74 lv.datamined
- Guardians
- 3 × lv. 78 — the journal near the second barrier marks them on the mapestimate
- Key Spheres required
- 8 — granted automatically, one per tower boss: nothing to farmestimate
- Zenara & Astralym
- lv. 80 duo, TYPELESSestimate
- World Tree priority order
- access → Paloxite → Holy Water → Radiant Gems → exclusive passives → Awakening → final Palsestimate